Saturday 30 July 2022

Last Sprint for Purple Sewing.

The time for sewing some purple fabric is running out fast. I still have to do some purple crumb blocks but I did succeed in doing some sewing this week. 

For the colour Purple, my Rainbow UFO Challenge is Framed 9-Patch and it is now a top. A small top. 

It measures 56 X 48 inches. I might add another row at the bottom. 

It won't reach twin bed size but at least it will be a better size throw. It is going back into the closet as the time to work on it is now over. Another month; another UFO Challenge. Wonder what Angela will call for August. 

I love this reversed one. 


Scrap Jar Star in purple and lots of 9-Patch blocks. 


For the solid coloured fabric, I was disappointed in the purple I had to play with. They look like funeral parlor purple. Yuck!


At the bottom of the pillowcase (yes, my solids live in a pillowcase, a huge one too), I found some more purple, but lovely ones this time. So I sew up more of this block. 


Pretty lilac and eggplant kind of purple make these blocks sing. The bottom left is more of a black cherry colour or deep red wine but since I didn't use it when we had the red month, I'm throwing it in this month. :^D 

And for la pièce de résistance, a purple placemat with lots of dots, circles and splashes! 

Even the background fabric has circles. And a cat for free! Haha. 


I finished the binding early this morning. The backing is something between dusty rose and color-me-purple on navy. It's an oldie but I am happy with the result. See Joyful Quilter's blog for more Table Scrap Challenge goodies. 


And here we are at the end. Phew! That was a lot of stuff this week. 
Things have returned to normal at work (whatever normal now means!) It was more fun getting up in the morning to go to work, you know I mean? anywho! It's a long weekend now and sewing is all I can think of. 

Enjoy! 


Joining my sewing sisters
Angela at So Scrappy 
Frédérique at Patchwork and Quilts
Cynthia for Oh Scrap! 


Saturday 23 July 2022

Purple is Painful

♫ I could be brown, I could be blue, I could be violet sky ♪ ♪

♪ ♫ I could be hurtful, I could be purple, I could be anything you like! 

 (Doesn't this part of Mika's song sounds like the description of a bruise or is that just me? ) 

Purple is a painful colour. Painful to describe, to photograph, to match; it has so many nuances and undertones that it must be the most colourful colour! There is something for everyone to like in this one.

And it's so much fun to work with! Let's see what happened in my sewing room. 


Three more Jericho Wall blocks were made. Can you believe it? I have 6 purple Jericho Wall blocks! Okay! Enough of this. Let's sew something else. 


How about 4 Star Bloom blocks? Love these together. 


I found a cat. I need it in my placemat. 

The little purple scrap had a curvy cut. It wasn't easy to fix it but the cat is on my mat! (Sounds like Dr. Seuss, right?) 

I also work on my Rainbow UFO Challenge. Purple is Framed 9-Patch quilt. These blocks need to be assembled. 

Three quadrants are done. One more to go and then, I will be three seams away from a top! 


It's smaller than what I had in mind. Should I make one more row? Add big borders? Some pondering to do here. 

Also, pondering about these cornerstones. Still. 


Very early this morning, I took it outside to take pictures as the weatherman promised a wet weekend. (It's almost noon now and it's bright and sunny!) Anywho! Black or red? Just one tiny difference and yet, it changes the entire quilt. I don't know which one I like best. 

I need to show you my purple flowers too. 

Colombine 

Aquilegia, the way we see them ... 

... and the insect's view. 


I believe I am done doodling chickadees. It's time to turn to colours. (I don't know why the photo turned bluish. It's weird!) 

It was an awful week at the office.  We are 4 team assistants, but with 2 on vacation = a lot more work for me. Yet, I did a lot of sewing too just to erase the tension from work in the evening. One assistant is returning on Monday. Yay! I survived, haha!


That's all I have for now. 
Cheers! 

;^)


Joining 
Angela at So Scrappy
Frédérique at Patchwork and Quilts 
Cynthia for Oh Scrap! 


Saturday 16 July 2022

Star Bloom Sewing (my method)

I received comments from bloggers asking questions about this block. So I took lots of photos while sewing the Star Bloom blocks and will share them with you (in case you want to make this quilt too). Hopefully, it will answer all the questions. If not, don't be shy to comment. (Sorry, Joyce but you appear as a non-reply comment.) 

Here we go. 

I start my HSTs as a square with a line drawn diagonally in the middle. If you prefer the flip-a-corner method, the measurements will be different. 

From the print fabric, cut 1 rectangle at 2 X 5" 
2 squares at 2" 
3 rectangles at 2 X 3.5" 
4 squares at 2.5" 

From the background fabric, cut 1 rectangle 2 X 3.5" 
4 squares at 2" 
4 squares at 2.5" 


I start with the HSTs as it takes the longest to prep. So take one 2.5" square from each fabric and sew 1/4" on each side of the diagonal line. Cut on the line. Press open and trim them down to 2" squares. Set them aside but not too far. 

Take one white 2" square and pair it with one 2" square print. Add to the bottom of this unit the 2 X 3.5" white rectangle. 
Sew one print rectangle with one 2" white square. Do the same with the 2 X 5 rectangle and a 2" white square. 


Sew 2 HSTs together in one direction, then sew 2 more in the other direction as per the picture below. 


(This is where the measurements are different if you do the flip-a-corner method.)
To the last 2 print rectangles 2 X 3.5, you will add one HST at both ends. Pay attention to the direction of the HSTs. They have to mirror each other. 


This is what you should have. 

To the square, you will sew the first pairs of HSTs you have assembled. 
One is added to the top and the second one is added to the right side along with the last 2" square print. Like this. Mind the direction of these units. The white part has to point toward each other, like a butterfly. 

The rest of the block is assembled like a log cabin. Sew the 2 X 3.5 rectangle to the left of the unit and sew the long 2 X 5 rectangle to the bottom. Like so. 


Almost done. The last 2" white square will be sewed to the unit pointing to the right. The unit pointing to the left will be sewn to the left of the block first. Sew the last strip to the bottom. Again, pay attention to the direction of the HSTs. The white part of the HSTs has to point toward the other one. 

Voilà! Your block is done. 

Enjoy! 

;^) 

Joining 
Angela at So Scrappy 
Frédérique at Patchword and Quilts
Cynthia for Oh Scrap! 


Wednesday 13 July 2022

While I'm at Jericho Wall (my method)

I thought of showing you my method for assembling this block. 

I've cut many pieces for the blocks: 2.5 X 3.5 and 2.5 X 2.5 from different background fabrics. I've also cut the black center piece : 2.5 X 2.5. I've cut long strips of my constant red fabric and paired them up with a background fabric at 1.5" X whatever I have. 

I subcut these only when it is chosen for a block. There are fewer chances that the stitches come undone when they aren't cut at 1.5 inches. 

Having these pieces at the ready saves me a lot of time when assembling the block. All I need now is to choose the print fabrics. Today it's Lilac! 

From the darker fabric, I'll cut 4 squares at 2.5" and from the lighter one 4 rectangles at 2.5 X 4.5". 

Then, I set up all the pieces, being careful not to have twice the same background fabric or one that is too loud for the rest. You know the drill. 

Next comes the selection of the red corner units. Since they are all different, it is easy to select four that aren't of the same fabric as the background fabrics. 

Voilà! The sewing can begin as I am satisfied with these pieces. 


Clockwise. I always sew clockwise, starting from the top left. In this photo, you can see that it is already sewn together and the red corner unit with the rectangle from the top right is under the needle. 
Only after these are done do I go to the next unit to be sewn: light and print squares. Again in a clockwise motion. 

Why do I work this way? Because of how our brain works. If I were to sew the top pieces, from left to right, consecutively, my brain has no idea what I'm doing. I would need to check the direction of the pieces all. the. time. 

Or else, I would end up with a block like this. See how the top left rectangle is not in the same direction as the others. The block is fine, the red corner is at the right place and all but still ... it's an OCD thing. If I spin the unit around to be vertical, the red corner will be inward. By sewing the same thing over and over, it is easier for the brain to register an error. 

Okay. Let's move on. Again, I sew the units together in a clockwise motion. The first unit is sewn, and the second one is under the needle. 


Then, I press and assemble the block in a 9-Patch fashion. 


In no time at all, my design wall looks like this.  


Enjoy! 


I've been pondering about the sashing for this quilt. I played on the computer with some pics to make a mockup. Now, I have a question for you.

Which option do you prefer?


                        1                                                       2                                                   3

1 - with black cornerstones. 
2 - with bright red cornerstones 
3 - with the same red cornerstones as the blocks 

I know my mockups are crooked (the pictures taken from my blog weren't cooperating as well as those I still had on hand). I'll try to make a better one with the real blocks on the floor. 

Take care, everyone! 

;^)

 Joining 
Angela at So Scrappy 
Frédérique at Patchwork and Quilts 
Cynthia for Oh Scrap! 


Saturday 9 July 2022

Looking For Purple

July is the month to sew our purple scraps, says Angela. I don't have a lot of purples compared to other colours but I'm sure I can manage some purplish sewing.

Let's see what happened this week.

Looking at the pictures I took this week, there aren't many with purple. I've mostly played with blue still. 

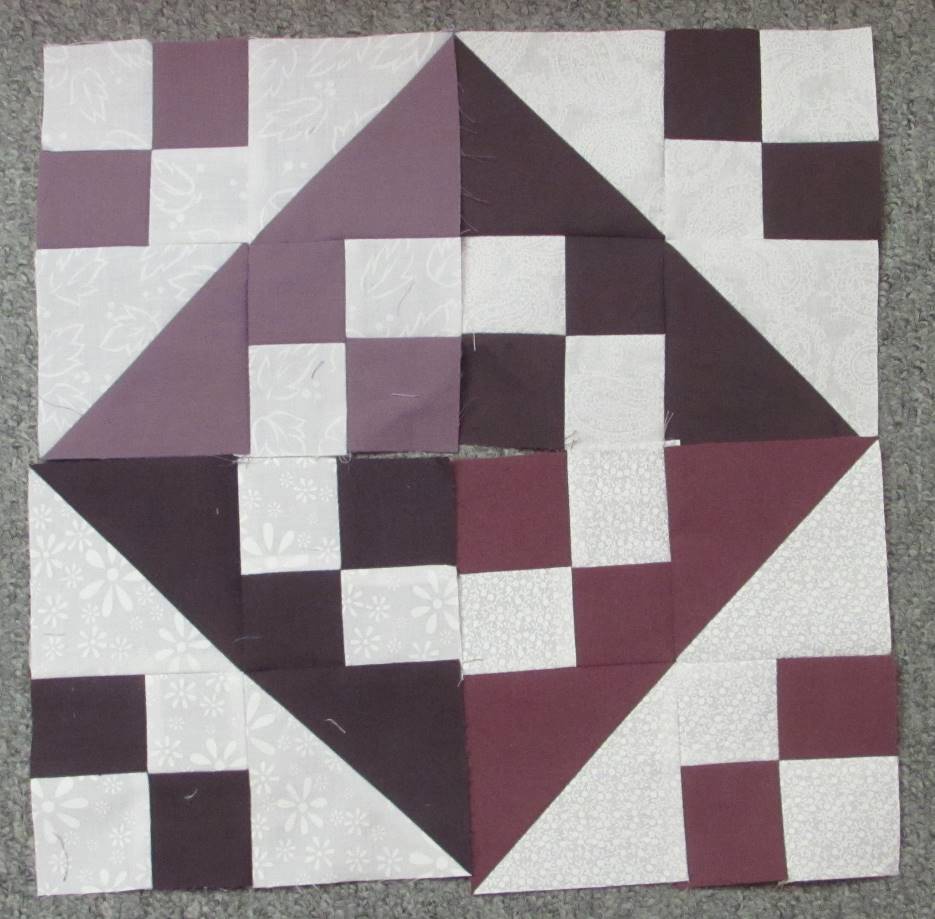
Two crumb blocks got finished. In the block on the right, the triangle, along with the pieces above and below, were reclaimed from the placemat I made the week before. There's a place for everything in these blocks. 
Trimmed block and not trimmed block

While putting the blue fabrics away, I came across this lovely piece. 

It was fussy cut by someone than gifted to me. I have nothing against fussy cutting but talk about going beyond the call of duty. Look at those deep brake marks. Every square taken out of this piece had deep laceration like this. Instead of putting it away like this, I slashed it down by following the "cutting lines". The pieces were easier to fold and store. 

I kept a few bits, grabbed a few more blues from the cutting table (there's always some) a little batting, and sandwiched it with a larger piece of the tortured fabric, and voilà! All done. Front and ... 

... back. Some simple straight quilting (not following the sewing lines) got the job done. On the left side, I don't know what I did with the binding (where the beginning gets connected to the tail), but it is the worst job ever! Oh well, it's just a little mug rug (7.5 X 5.75) for the office. 


Something strange happened this week. It was a beautifully blue-clouded sky with some pink from the sunset, but if you look closely to the right of the photo, where the tree is the tallest, there's a pink ... tail (?) coming down from the pink cloud. This picture doesn't do it justice, of course, I'm not a very good photographer, but in person, it looked like a rainbow with only pink and orange. Weird! We have a mix-match of weather lately, and now, even the rainbows don't know how to rainbow anymore. Hahaha! 


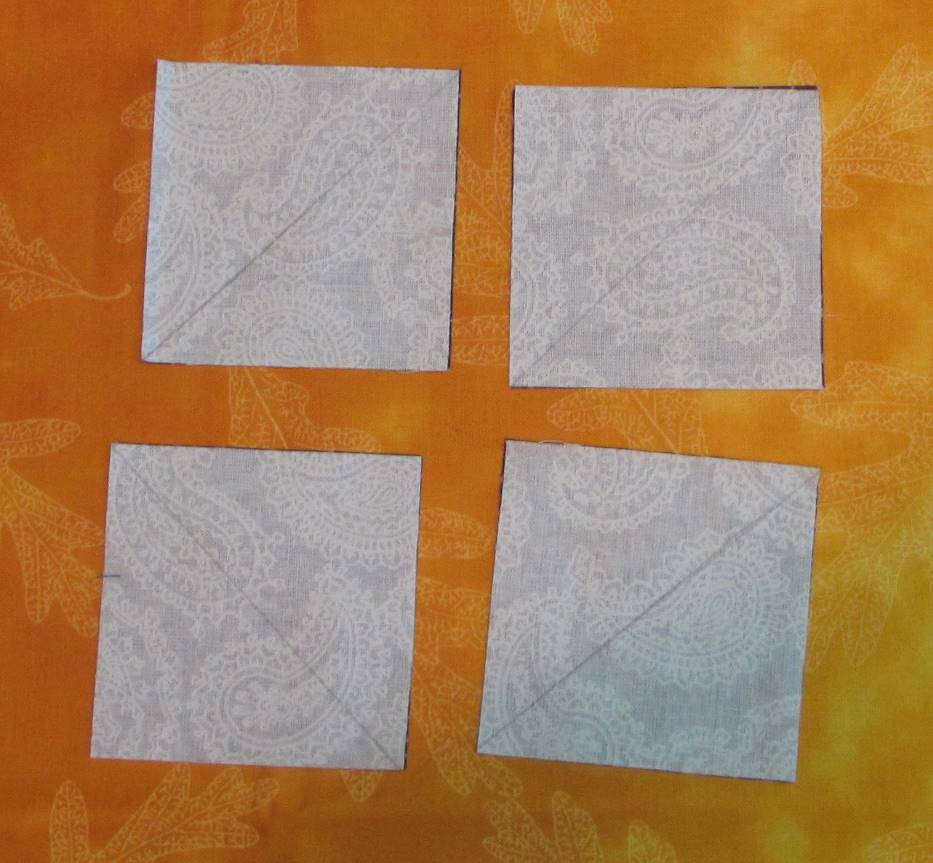
A session on trimming HSTs was also endured scheduled. A new ID card holder is needed as this is what the back of my beautiful cardinal one looks like. Dirty, used, and tired looking. 


On Tuesday morning, I had a brand new holder with shiny transparent vinyl. Yay! 

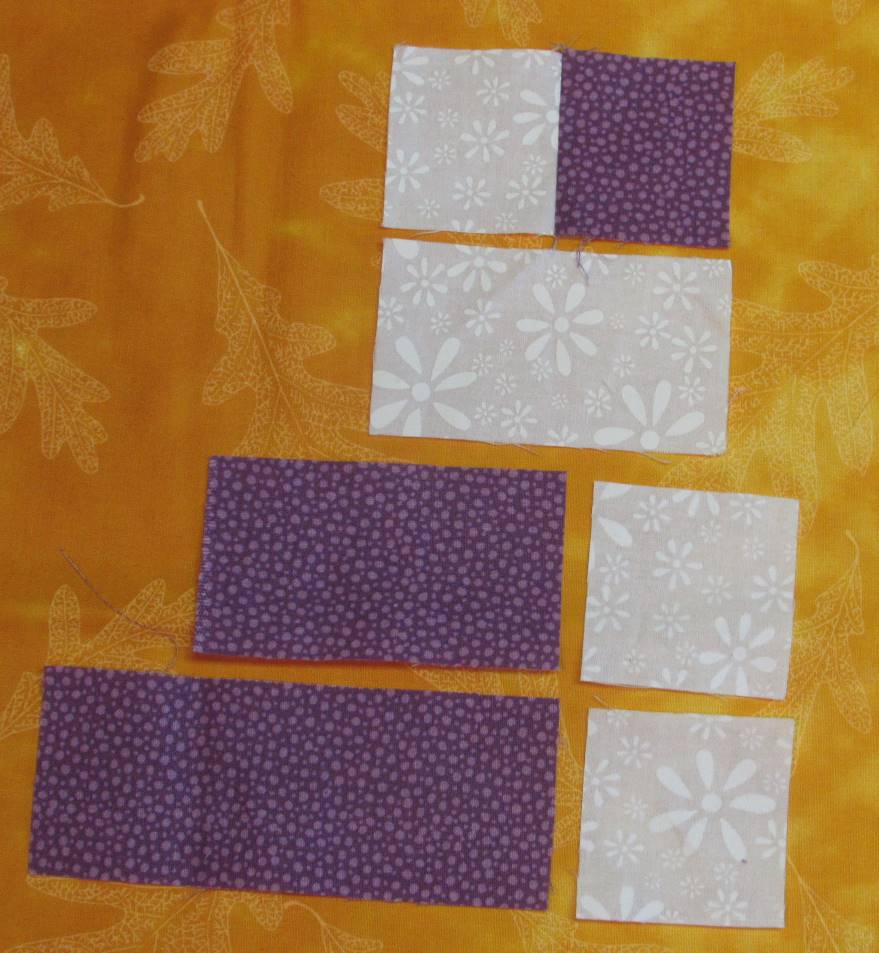
Finally, this morning (Saturday), I started to play with purple! I pulled some fabrics out to pair them up for Jericho Wall blocks. It went pretty fast this time. My first picks were these two. 


They play so well together. It is so beautiful in this photo but the colour is way off. 


This picture shows the colour better. It is more periwinkle than a true purple. It is dark, but it will do. It will balance out the dark blue one I made last month, and everything will be good in the end. I've paired more purples, so more Jericho Wall blocks to show next time. 

Meanwhile, happy sewing. 

;^)


Joining 
Angela at So Scrappy 
Frédérique at Patchwork and Quilts 
Cynthia for Oh Scrap!