Here we go.
I start my HSTs as a square with a line drawn diagonally in the middle. If you prefer the flip-a-corner method, the measurements will be different.
From the print fabric, cut 1 rectangle at 2 X 5"
2 squares at 2"
3 rectangles at 2 X 3.5"
4 squares at 2.5"
From the background fabric, cut 1 rectangle 2 X 3.5"
4 squares at 2"
4 squares at 2.5"

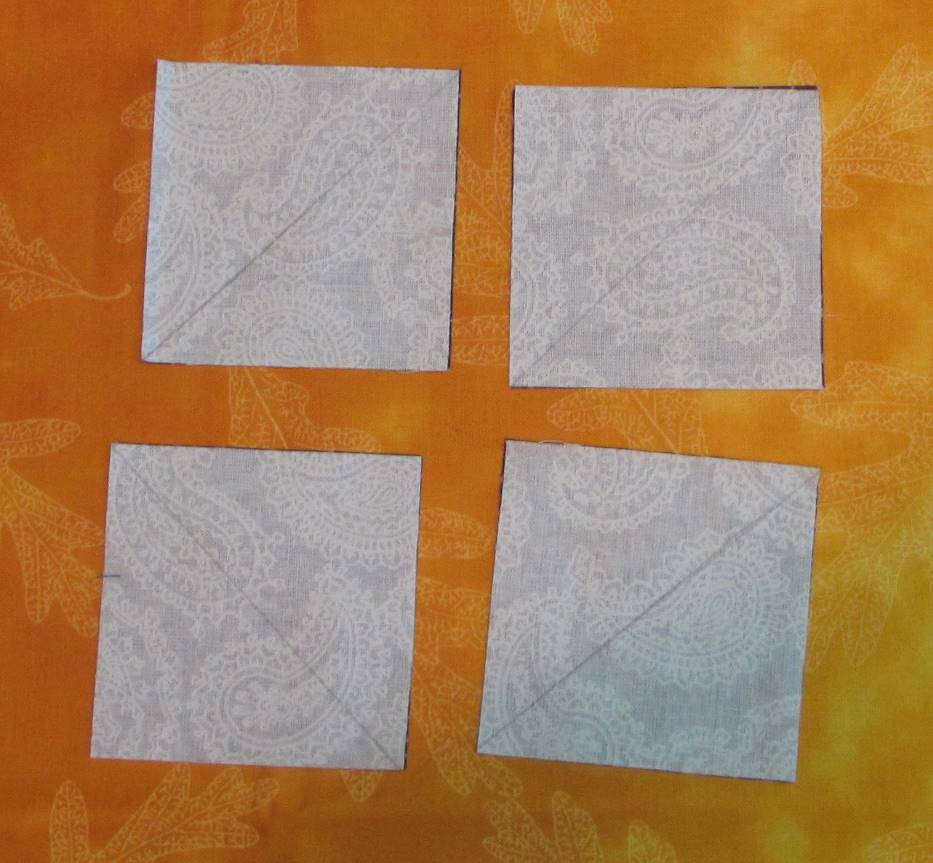
I start with the HSTs as it takes the longest to prep. So take one 2.5" square from each fabric and sew 1/4" on each side of the diagonal line. Cut on the line. Press open and trim them down to 2" squares. Set them aside but not too far.
Take one white 2" square and pair it with one 2" square print. Add to the bottom of this unit the 2 X 3.5" white rectangle.
Sew one print rectangle with one 2" white square. Do the same with the 2 X 5 rectangle and a 2" white square.
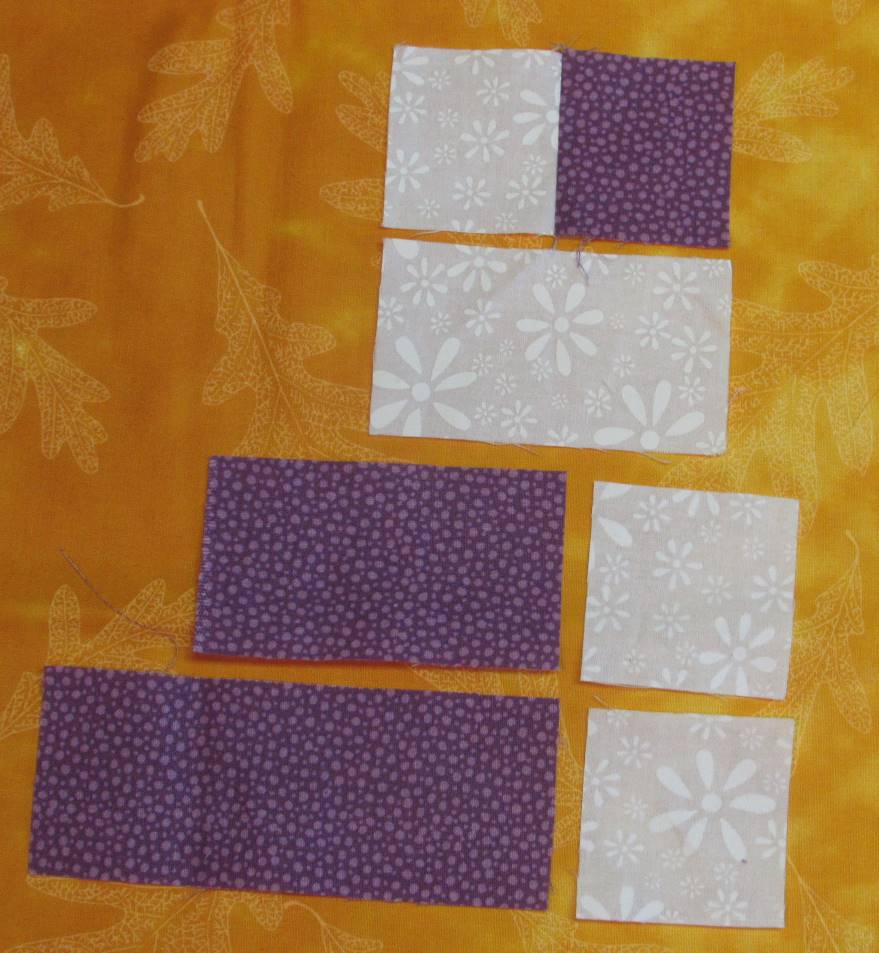

To the last 2 print rectangles 2 X 3.5, you will add one HST at both ends. Pay attention to the direction of the HSTs. They have to mirror each other.

This is what you should have.

To the square, you will sew the first pairs of HSTs you have assembled.
One is added to the top and the second one is added to the right side along with the last 2" square print. Like this. Mind the direction of these units. The white part has to point toward each other, like a butterfly.


Almost done. The last 2" white square will be sewed to the unit pointing to the right. The unit pointing to the left will be sewn to the left of the block first. Sew the last strip to the bottom. Again, pay attention to the direction of the HSTs. The white part of the HSTs has to point toward the other one. 

Voilà! Your block is done.

Enjoy!
;^)
Joining
Angela at So Scrappy
Frédérique at Patchword and Quilts
11 comments:
That is such a great block.... lots of work in it
Hugz
Bookmarking this! It's such a cool block!
Saving your directions, this is such an interesting block. You wrote really clear and easy to follow instructions. Thanks for doing this.
Your Star Bloom block is so pretty! What a great RSC block!!!
Fabulous block. Thank you so much for sharing how to make it. Have a wonderful weekend. Happy quilting.
Thanks for the excellent directions. I'll file this idea away as I really like the design.
Pat
Thank you!
Thanks for showing us how you make these pretty blocks! Great directions!
Terrific directions! This block is like magic, since you can't guess what it will look like until you start putting together multiples. Such fun!
Thanks so much for doing this. I am headed to my sewing room to give it a try this afternoon. Thank you, thank you, thank you.
Excellent tutorial for a lovely block. Should make for a stunning 2022 RSC quilt.
Post a Comment